Creating a Knowledge Stack
Step-by-step guide to creating and populating Knowledge Stacks
If you're looking for the Msty Studio documentation instead, you can find it here: Go to Msty Studio Docs →
Learn more about Msty Studio at Msty.ai →
1. Start a New Stack
Click the Knowledge Stack button in the sidebar to begin

New Knowledge Stack button in sidebar
2. Add Your Content
Documents & Files
Drag and drop or browse for:
- PDFs, Word docs, text files
- Code files and spreadsheets
- EPUBs and RTF documents
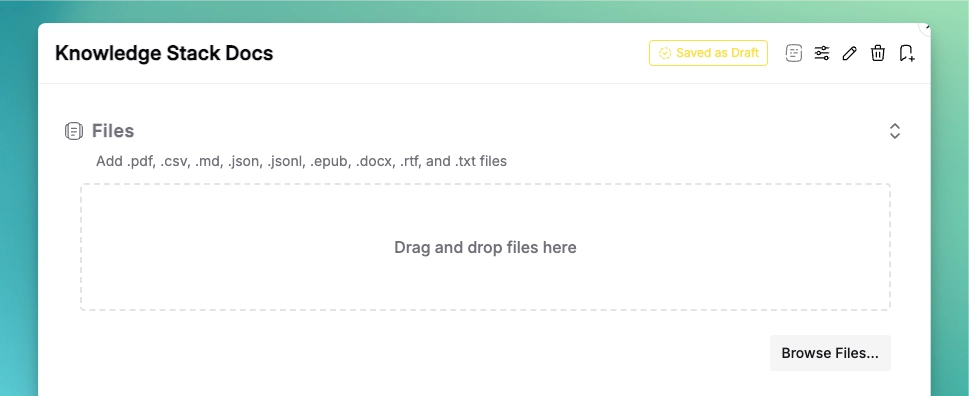
File import interface

3. Configure Processing
Click the gear icon to adjust chunk settings:

Chunk processing settings
- Embedding Model: Choose local or cloud-based
- Splitter Type: Recursive vs sentence-based
- Chunk Size: Balance context vs specificity
- Overlap: Control context connections
Need help choosing settings? See our Advanced Configuration Guide
4. Fine-tune Search
Click the sliders icon for precision controls:
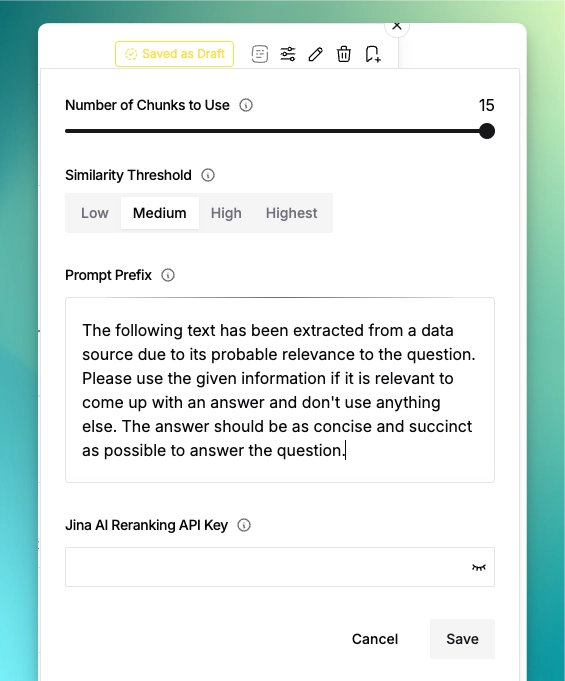
Search settings interface
- Results quantity and quality thresholds
- Custom prompt prefixes
- Jina AI reranking integration
5. Save & Activate
Choose your workflow:
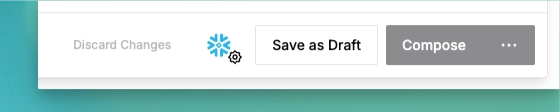
Save and compose buttons
- Save Draft: Store unfinished stack
- Compose: Build ready-to-use stack
- Three-dot Menu: Update existing stacks
Remember: You can always recompose your stack later if you add new content or change settings!
6. Chat with Your Stack
Access your knowledge in any chat:
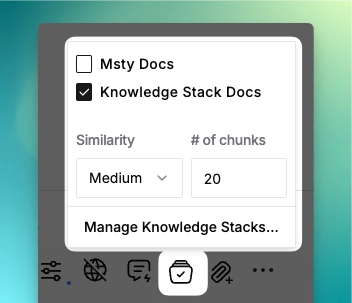
Knowledge Stack selection in chat interface
- Start a new chat
- Click the Knowledge Stack icon
- Select stacks to reference
- Adjust settings:
- Similarity: Match strictness (Low=Broad, High=Exact)
- Chunks: Number of references to use
- Ask natural language questions
Pro Tip: Combine multiple stacks for cross-reference queries! The selected stacks will show a checkmark badge when active.
Want deeper control? Learn about optimizing search results and how RAG works.